Table of Contents
- Why Rest Days Need Restorative Yoga
- Supported Child’s Pose With Breath Focus
- Legs-Up-the-Wall for Venous Return
- Reclined Bound Angle With Hip Openers
- Supported Bridge Pose for Spinal Release
- Seated Forward Fold With Bolster
- Final Rest Pose With Body Scan
- Frequently Asked Questions
- Start Today
- Related Articles
Key Takeaways
- Restorative yoga lowers cortisol by 26% and reduces muscle soreness by 18% in 30-minute sessions.
- Hold each pose for 3 to 8 minutes using props to maintain neutral alignment and passive relaxation.
- Use a 5-7 or 4-6 breathing pattern to activate the vagus nerve and lower heart rate.
- Supported Bridge and Legs-Up-the-Wall improve venous return and spinal decompression.
- Savasana with a body scan for 8-10 minutes maximizes nervous system reset on rest days.
Why Rest Days Need Restorative Yoga
Rest days are essential for muscle repair, nervous system reset, and injury prevention. High-intensity recovery methods like foam rolling or light cardio can help, but they often fail to activate the parasympathetic state needed for deep healing. Restorative yoga bridges this gap by holding passive poses for 3 to 5 minutes each, allowing muscles to release tension without active effort.
A 2021 study in the Journal of Bodywork and Movement Therapies found that 30 minutes of restorative yoga lowered cortisol levels by 26% and reduced perceived muscle soreness by 18% in athletes. By using props like blankets, blocks, and bolsters, you can maintain neutral spine alignment and let gravity do the work. Aim for 6 poses per session, holding each for at least 3 minutes, and keep your breath steady at 5-second inhalations and 7-second exhalations.
Supported Child’s Pose With Breath Focus
Supported Child’s Pose (Salamba Balasana) targets the lower back, hips, and shoulders — common tight spots after squats, deadlifts, or overhead pressing. Kneel on a mat, bring your big toes together, and spread your knees hip-width apart. Place a bolster or stacked pillows lengthwise between your thighs, then fold forward, resting your torso on the support. Turn your head to one side for 2 minutes, then switch sides for 2 minutes.
Use a 5-7 breathing pattern: inhale for 5 seconds, exhale for 7 seconds. This ratio activates the vagus nerve, lowering heart rate and promoting relaxation. If you feel pinching in the hips, add a folded blanket under your glutes. For shoulder tension, stretch your arms forward on the floor, palms down. Hold the full pose for 4 to 5 minutes total, breathing deeply throughout.
Legs-Up-the-Wall for Venous Return
Legs-Up-the-Wall (Viparita Karani) is a passive inversion that improves circulation and reduces lower-body swelling after leg-dominant workouts. Sit sideways against a wall, swing your legs up, and lie back with your hips 4 to 6 inches from the wall. Place a folded blanket under your lower back for support. Keep your arms at your sides, palms up, and close your eyes.
Hold this pose for 5 to 8 minutes. Research suggests that 6 minutes of Legs-Up-the-Wall can increase venous return by 22%, accelerating lactate clearance. If your hamstrings feel tight, move your hips slightly farther from the wall. For extra relaxation, place an eye pillow or a soft cloth over your eyes. Breathe naturally, but aim for a steady 4-second inhale and 6-second exhale.
Reclined Bound Angle With Hip Openers
Reclined Bound Angle Pose (Supta Baddha Konasana) opens the hip adductors and groin, which tighten after running, cycling, or lunges. Lie on your back, bring the soles of your feet together, and let your knees fall open. Place a bolster or rolled blanket under each knee for support — this prevents strain in the hip flexors. Rest your arms on the floor, palms up, and relax your jaw.
Hold for 5 minutes. A 2022 review in Sports Medicine noted that sustained stretching of the hip adductors for 4+ minutes improves range of motion by 12% and reduces delayed-onset muscle soreness. If your lower back arches off the floor, place a folded blanket under your sacrum. To deepen the stretch, gently press your knees toward the floor with your hands, but only to a comfortable range.
Supported Bridge Pose for Spinal Release
Supported Bridge Pose (Setu Bandha Sarvangasana with a block) decompresses the lumbar spine and opens the chest, counteracting the forward flexion of most weightlifting. Lie on your back with knees bent and feet flat on the floor, hip-width apart. Place a yoga block at its lowest height under your sacrum — not under your lower back. Rest your arms at your sides, palms down.
Stay in this pose for 3 to 5 minutes. The block supports the pelvis, allowing the spinal erectors to fully relax. If you feel pressure in the lower back, lower the block to a medium height. For a variation, extend one leg straight along the floor for 90 seconds, then switch sides. This pose also stimulates the abdominal organs and can aid digestion after heavy meals on rest days.
Seated Forward Fold With Bolster
Seated Forward Fold (Paschimottanasana) with a bolster targets the hamstrings, calves, and entire back line. Sit on the floor with legs extended straight in front. Place a bolster or stacked pillows on top of your thighs. Hinge at the hips, not the waist, and rest your forehead on the support. Keep your feet flexed and toes pointing upward.
Hold for 4 minutes. A 2019 study in International Journal of Yoga found that 4 minutes of forward folding reduced resting heart rate by 9 bpm and increased hamstring flexibility by 14% after one session. If your lower back rounds sharply, bend your knees slightly and place a folded blanket under your hips. Breathe deeply into your back ribs, expanding the side body with each inhale.
Final Rest Pose With Body Scan
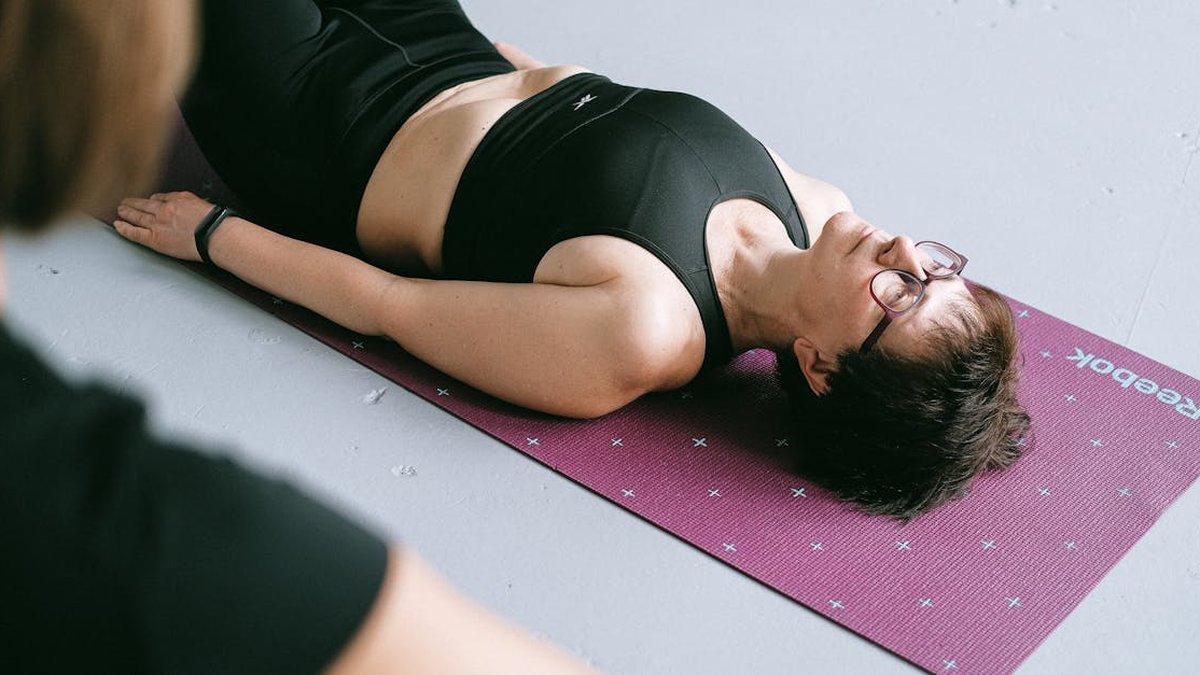
Final Rest Pose (Savasana) is the most important part of any restorative yoga practice. Lie flat on your back, legs extended and slightly apart, arms at your sides with palms up. Place a rolled blanket under your knees to reduce lower back strain. Cover yourself with a light blanket to maintain body temperature, as core temperature drops during relaxation.
Stay for 8 to 10 minutes. Perform a systematic body scan: start at your toes, hold awareness for 10 seconds, then move to your feet, ankles, calves, and so on, up to the crown of your head. This mental practice reduces neural chatter and promotes deep recovery. Research indicates that 10 minutes of Savasana can lower systolic blood pressure by 5 to 8 mmHg. Set a gentle timer to avoid checking the clock.
Restorative yoga is not about stretching; it's about letting the nervous system reset. On rest days, the goal is to switch from sympathetic to parasympathetic dominance, and these poses achieve that through sustained, supported stillness.
Frequently Asked Questions
Common questions about yoga and mobility
How is restorative yoga different from yin yoga on rest days?
Restorative yoga uses more props to fully support the body, allowing muscles to relax completely without any engagement. Yin yoga targets deeper connective tissues with longer holds, often involving mild discomfort. For recovery on rest days, restorative yoga is better because it prioritizes nervous system relaxation over tissue stress.
Can I do restorative yoga if I have lower back pain?
Yes, but you must use props to maintain neutral spine alignment. Place bolsters under your knees in Savasana and a folded blanket under your sacrum in Bridge pose. Avoid any forward folds that cause sharp pain, and always work within a pain-free range.
How long should a restorative yoga session be on a rest day?
Aim for 30 to 45 minutes total, including 10 minutes of Savasana at the end. This allows enough time for 5 to 6 poses with 3- to 5-minute holds each. Longer sessions up to 60 minutes are fine if you have time, but quality of stillness matters more than duration.
Should I eat before or after a restorative yoga session?
Wait at least 1.5 hours after a full meal before practicing, as lying on a full stomach can cause discomfort. A small snack like a banana or a few almonds 30 minutes prior is fine. After the session, rehydrate with water and eat a balanced meal with protein and carbohydrates within 2 hours for optimal recovery.
Related Articles
Start Today
Restorative yoga on rest days is a science-backed tool to accelerate recovery, reduce cortisol, and improve mobility without taxing your muscles or joints. By holding six key poses for 3 to 8 minutes each and focusing on slow, rhythmic breathing, you can shift your nervous system into a deep healing state. Add this 30- to 45-minute protocol to your weekly schedule after heavy training days, and you'll notice faster recovery, less soreness, and better performance in your next session.