Table of Contents
Key Takeaways
- Set up with the bar across your upper back, feet shoulder-width apart, and core braced before unracking.
- Descend until your hip crease drops below your knee for full glute activation and safety.
- Drive through midfoot and heels on the ascent, exhaling after the sticking point.
- Avoid knee collapse, butt wink, and heels lifting by addressing mobility and technique first.
- Use the 4-week program: 70-85% 1RM, increasing sets and decreasing reps weekly, with a deload in week 5.
Why the Barbell Squat Matters
The barbell squat is a foundational compound movement that targets the quadriceps, hamstrings, glutes, and core. When performed correctly, it builds functional strength, improves mobility, and increases bone density. However, poor form leads to injury and stalled progress. This guide breaks down each phase of the squat, from setup to ascent, so you can lift heavier with confidence.
Research shows that squats with a load of 80–90% of your one-rep max (1RM) for 3–5 sets of 3–5 reps optimize strength gains. Beginners should start with the bar (20 kg / 45 lbs) and add 2.5–5 kg (5–10 lbs) per session until form breaks down. Always prioritize technique over weight.
Setup and Bar Placement
Begin by positioning the barbell at shoulder height on the squat rack. Step under the bar and place it across your upper back, not on your neck. For a high-bar squat, the bar rests on your trapezius muscles; for low-bar, it sits slightly lower across your rear deltoids. Grip the bar with hands just outside shoulder width, wrists neutral.
Brace your core by taking a deep breath into your belly, not your chest. Unrack the bar by straightening your legs, take two steps back, and set your feet shoulder-width apart with toes pointed slightly outward (15–30 degrees). Keep your weight centered over midfoot. This setup takes 3–5 seconds but prevents imbalances that cause forward leaning or knee collapse.
The Descent and Depth
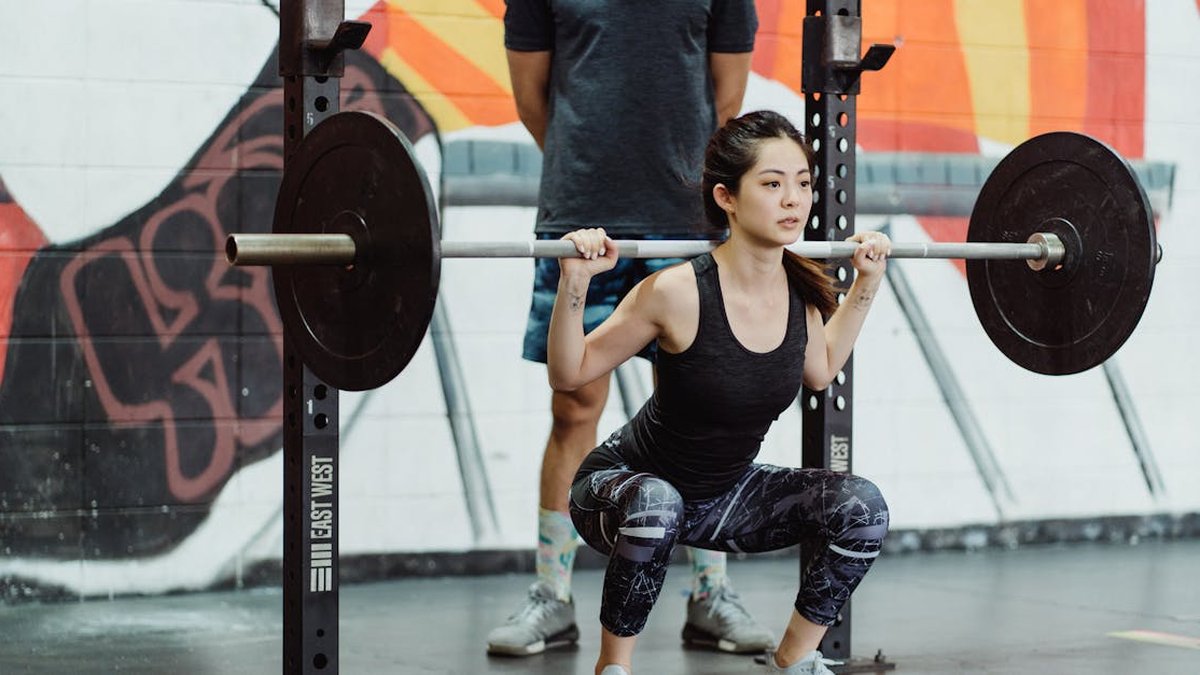
Initiate the squat by pushing your hips back and bending your knees simultaneously. Maintain a neutral spine — do not round your lower back. Lower your body until your hip crease drops below your knee (parallel or deeper). For most lifters, this occurs at a 90–120 degree knee angle. Keep your chest up and elbows pointed down throughout the movement.
Depth is critical for glute and hamstring activation. A study in the Journal of Strength and Conditioning Research found that full-depth squats (hip crease below knee) produce 25% more glute activation than quarter squats. If ankle mobility limits depth, place 2.5–5 cm (1–2 inch) plates under your heels. Do not sacrifice form to hit depth — maintain tension in your core and back.
The Ascent and Breathing
Drive through your midfoot and heels to stand up. Keep your knees tracking over your toes — do not let them cave inward. As you rise, exhale forcefully through pursed lips after you pass the sticking point (typically the bottom third of the lift). Inhale and brace again at the top before the next rep.
Use the Valsalva maneuver for heavy sets: take a deep breath, hold it, and brace your core as you descend and ascend. This increases intra-abdominal pressure by 30–40%, protecting your spine. Release the breath at the top of the rep. Never hold your breath for more than 5 seconds to avoid excessive blood pressure spikes. For sets of 5+ reps, take a fresh breath every rep.
Common Mistakes and Fixes
Knee collapse: Weak glute medius causes knees to cave. Fix by performing banded walks (3 sets of 15 steps each direction) and focusing on pushing knees outward during the squat. Butt wink: Posterior pelvic tilt at the bottom limits depth and strains the lower back. Improve hip mobility with 90/90 stretches (hold 30 seconds per side, 3 reps).
Heels lifting: Ankle dorsiflexion deficiency shifts weight forward. Elevate heels with weight plates or invest in squat shoes with a 0.75–1.5 cm heel lift. Bar path drift: The bar should travel in a straight vertical line over midfoot. Film yourself from the side; if the bar moves forward, your torso is leaning too much. Reduce weight by 10–15% and practice tempo squats (3-second descent, pause 1 second, explosive ascent).
Sample 4-Week Squat Program
This program uses linear progression. Perform it twice per week, with 48–72 hours between sessions. Warm up with 2 sets of 10 bodyweight squats and 2 sets of 5 with the empty bar. Use the table below for your working sets.
| Week | Sets | Reps | Load (% 1RM) | Rest (min) |
|---|---|---|---|---|
| 1 | 4 | 6 | 70% | 2 |
| 2 | 4 | 5 | 75% | 2.5 |
| 3 | 5 | 4 | 80% | 3 |
| 4 | 3 | 3 | 85% | 3.5 |
After week 4, deload by reducing load to 60% of 1RM for 3 sets of 5 reps. Then retest your 1RM or start a new cycle with an adjusted max. Accessory work: add Romanian deadlifts (3 sets of 8–10) and walking lunges (3 sets of 10 per leg) on squat days.
Equipment and Safety Tips
Invest in a quality barbell (20 kg for men, 15 kg for women standard) and a power rack with safety pins set at hip height. For loads above 80% of 1RM, use a belt to increase intra-abdominal pressure by 15–20%. Knee sleeves (not wraps) provide warmth and proprioception but do not add significant weight.
Always squat inside the rack with safety pins set just below your squat depth. If you fail a rep, lower the bar onto the pins — do not bail forward or backward. Never squat alone with maximal loads. Have a spotter behind you who can assist with an overhand grip on the bar during the ascent. Progress load by no more than 5% per week to allow tendon adaptation.
The squat is not just a leg exercise — it is a full-body movement that demands coordination, stability, and patience. Master the basics before chasing numbers.
Frequently Asked Questions
Common questions about strength training
How deep should I squat for strength gains?
Squat to parallel or below, where your hip crease is lower than your knee. Full-depth squats activate the glutes and hamstrings more effectively than partial squats. If mobility limits depth, work on ankle and hip flexibility before adding weight.
Should I use a high-bar or low-bar squat position?
High-bar (bar on traps) is more quad-dominant and easier for beginners to learn. Low-bar (bar on rear delts) allows heavier loads and engages the posterior chain more. Choose based on your anatomy and comfort; both are effective when performed with correct form.
How often should I squat each week?
Squat 2–3 times per week with at least 48 hours between sessions for recovery. Beginners benefit from 2 sessions, while advanced lifters can handle 3. Always deload every 4–6 weeks by reducing load by 20–30% to prevent overtraining.
What should I do if my lower back hurts after squatting?
First, check your form: a rounded lower back or excessive forward lean often causes pain. Reduce weight by 10–15% and focus on bracing your core. If pain persists, consult a physical therapist. Do not squat through sharp or radiating pain.
Related Articles
Start Today
The barbell squat is a skill that rewards consistency and attention to detail. By mastering setup, depth, and breathing, you transform a simple lift into a powerful tool for strength and muscle growth. Follow the 4-week program, fix common mistakes early, and always prioritize form over ego. Your progress will compound rep by rep.